Cognex Support Hub
How to write data from TCP-IP to compare a string from EL Read tool in EasyBuilder view
This document will explain how to write a string from TCP/IP to compare it with the EL Read result string.
11/29/2024
This document will explain how to write a string from TCP/IP to compare it with the EL Read result string.
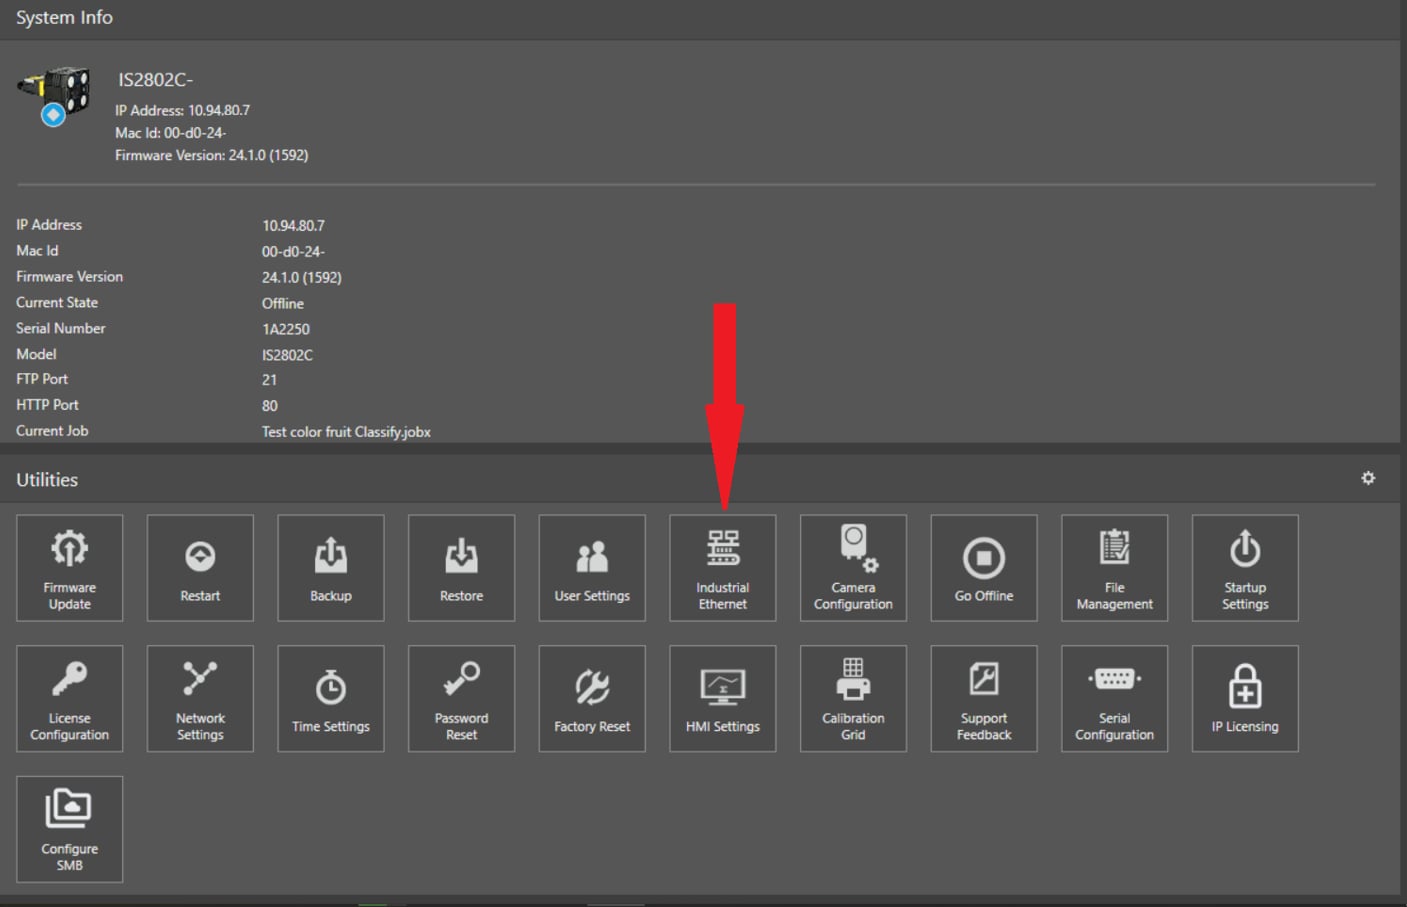
First of all, the camera has to be set to communicate in TCP/IP Native Mode, and you can do this from the In-Sight Vision Suite main page, by clicking here:
And then, in the next window, check the Telnet Server Enabled flag:
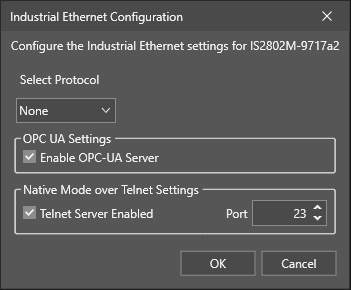
If you want, is possible to change the port, by selecting the desired one.
Now, press OK and the camera will be able to communicate in Telnet > TCP/IP
For this example, we will use a Read EL and a Math Tool. You can configure the Read EL tool as you wish, and then we can set the Math tool.
Done? Ok, let’s go.
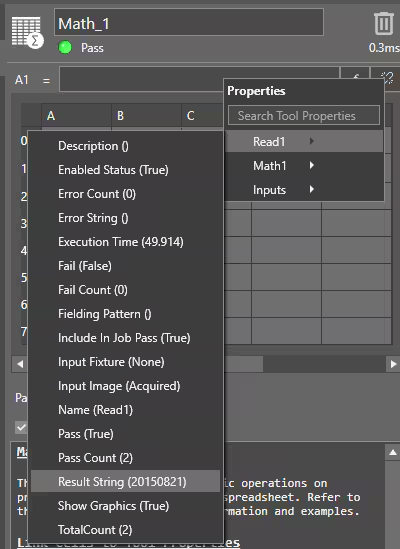
First, you have to import the Result String from the EL Read into the Math tool, we’ll use cell A1:
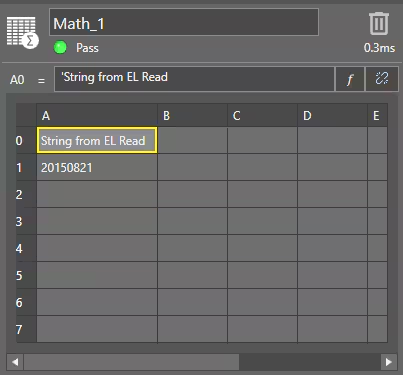
And this is what it will be, with a comment in A0:
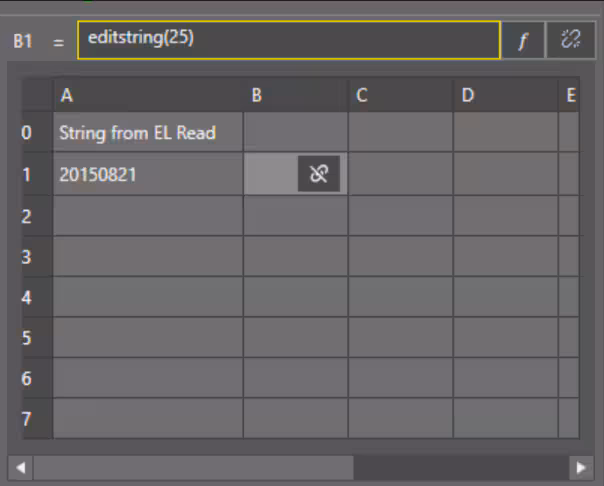
Now we can set an EditString in B1, like this:
Then, in the end, we can set an Exact function in C1, like this:
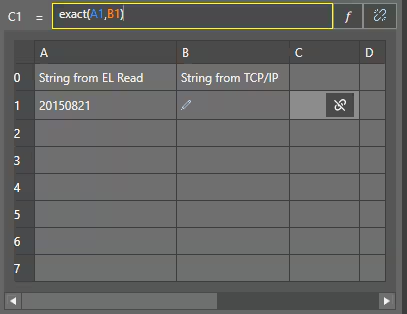
This is what will appear:

Now, let’s check the communication part. For this test, you can use Hercules, a free utility, available here:
https://www.hw-group.com/software/hercules-setup-utility
Once started, go to the TCP Client tab, insert the camera IP address and port, and click connect
As you can see, the camera will ask for a User, default one is “admin” (without quotation marks).

Write it in the Send part, like in the image, and click the related Send button.
The camera will ask for a password:
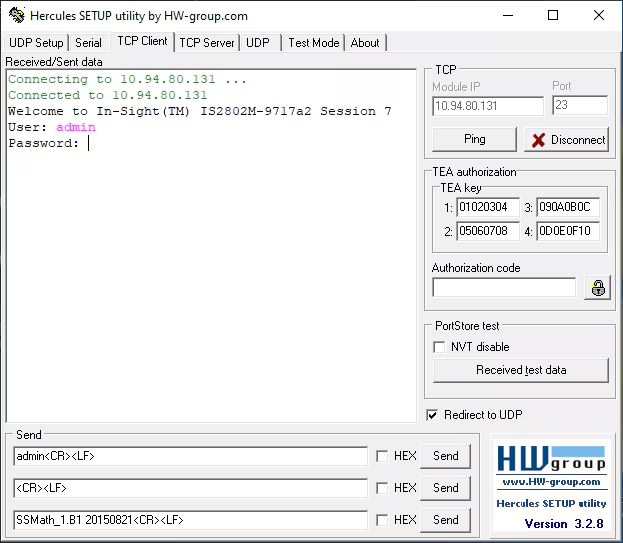
The default password for Admin is blank, so no password.
You can send only the CR and LF characters to the camera.
In the second Send line, this is how Hercules handles the CR & LF, as <CR> & <LF>:
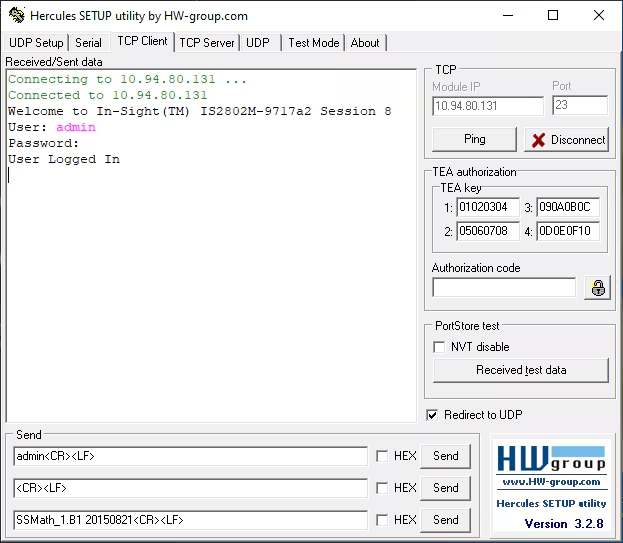
Once the password is sent, you’ll receive a User logged In answer, this means that the camera is ready to receive commands from Telnet or TCP/IP.
At this point, you can use the formula in the third Send button, which is a composed string, as
SSMath_1.B1 20150821
SS = Set String, the command used to send a string to the camera.
Math_1 = Tool name where to send the string.
B1 = Cell where to write the next string.
20150821 = The string we want to write, in this example.
Please pay attention, there is a space between the command and the string to send.
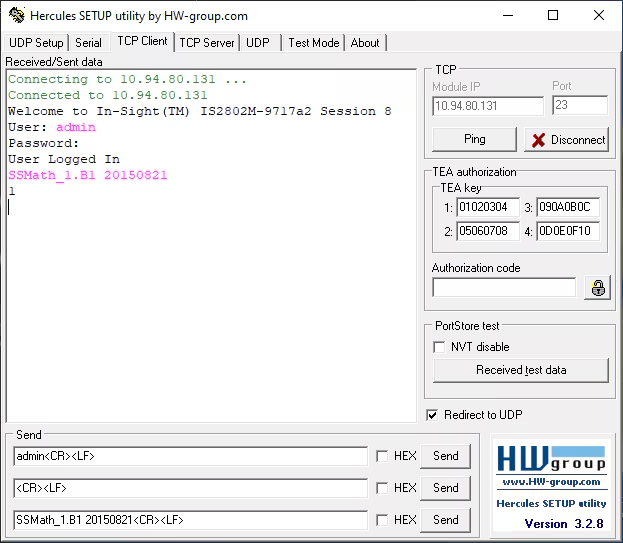
If the command is correct, you’ll receive a 1 as an answer, otherwise several other answers can arrive.
Those answers are available in the related Help section of the In-Sight Vision Suite software.
Now, if you go back to the Math tool, you’ll see that cell B1 has been modified, like this:
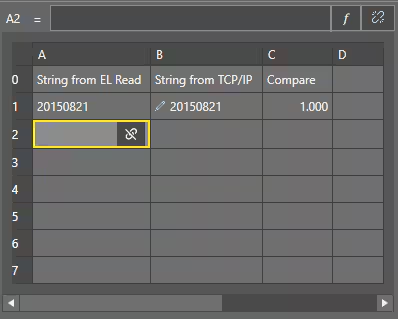
This happens because now the string from TCP/IP has been written into this field.
Then, in cell C1, you’ll find the result of th comparison between the read string and the string from TCP/IP.
First of all, the camera has to be set to communicate in TCP/IP Native Mode, and you can do this from the In-Sight Vision Suite main page, by clicking here:
And then, in the next window, check the Telnet Server Enabled flag:
If you want, is possible to change the port, by selecting the desired one.
Now, press OK and the camera will be able to communicate in Telnet > TCP/IP
For this example, we will use a Read EL and a Math Tool. You can configure the Read EL tool as you wish, and then we can set the Math tool.
Done? Ok, let’s go.
First, you have to import the Result String from the EL Read into the Math tool, we’ll use cell A1:
And this is what it will be, with a comment in A0:
Now we can set an EditString in B1, like this:
Then, in the end, we can set an Exact function in C1, like this:
This is what will appear:
Now, let’s check the communication part. For this test, you can use Hercules, a free utility, available here:
https://www.hw-group.com/software/hercules-setup-utility
Once started, go to the TCP Client tab, insert the camera IP address and port, and click connect
As you can see, the camera will ask for a User, default one is “admin” (without quotation marks).
Write it in the Send part, like in the image, and click the related Send button.
The camera will ask for a password:
The default password for Admin is blank, so no password.
You can send only the CR and LF characters to the camera.
In the second Send line, this is how Hercules handles the CR & LF, as <CR> & <LF>:
Once the password is sent, you’ll receive a User logged In answer, this means that the camera is ready to receive commands from Telnet or TCP/IP.
At this point, you can use the formula in the third Send button, which is a composed string, as
SSMath_1.B1 20150821
SS = Set String, the command used to send a string to the camera.
Math_1 = Tool name where to send the string.
B1 = Cell where to write the next string.
20150821 = The string we want to write, in this example.
Please pay attention, there is a space between the command and the string to send.
If the command is correct, you’ll receive a 1 as an answer, otherwise several other answers can arrive.
Those answers are available in the related Help section of the In-Sight Vision Suite software.
Now, if you go back to the Math tool, you’ll see that cell B1 has been modified, like this:
This happens because now the string from TCP/IP has been written into this field.
Then, in cell C1, you’ll find the result of th comparison between the read string and the string from TCP/IP.