Cognex Support Hub
How To Set Up the DataMan 475v And Save Report Verifier
Follow these steps to set up the DataMan 475V verifier
01.04.2025
Follow these steps to set up the DataMan 475V verifier
DataMan 475V Operation SOP
Software Platform: 6.1.10_sr3
Firmware Version: 6.1.10_sr3
Hardware Configuration: DM475X main unit + X-V feature key + LBL kit
Overview:
The DataMan 475V is Cognex's latest 5-megapixel online quality verifier. Unlike our PCM and SBG systems, the use of the DataMan 475V is constrained by fixed hardware configurations, including the lens, lighting, working distance, etc., which must be noted before operation.
Given its online full-inspection feature, customers are likely to focus on the data output during operation and its coordination with PLCs. This document details how to configure the DataMan 475V using the Setup Tool software and how to export verification reports in Excel format or save them to a specified file path, whether in PDF or HTML format.
Setup Procedure:
1. Calibrate the DataMan 475V
a) After upgrading the feature key, the DataMan 475V will automatically enter the Trucheck interface (if this interface is lost during use, it can be reopened via the \<View\> menu in the Setup Tool). Calibration must be performed before initial use.
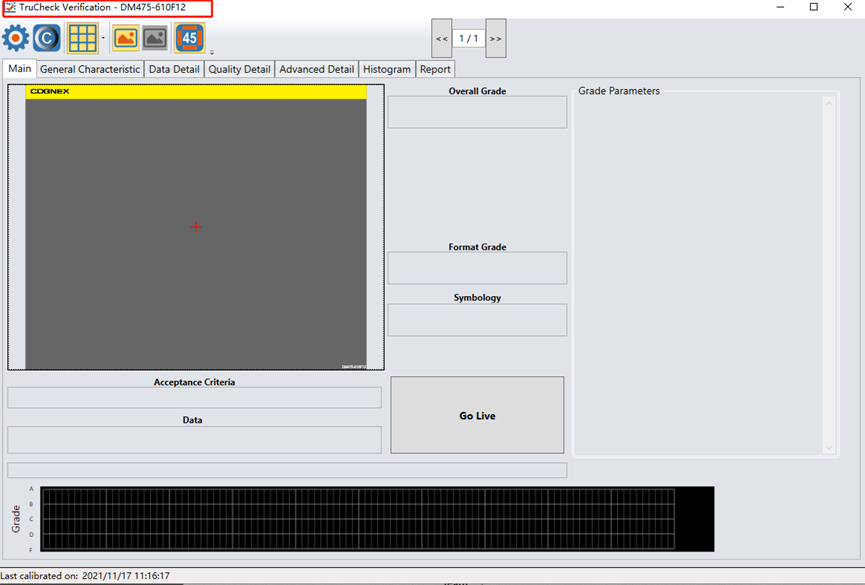
b) Click the "C" icon on the interface to enter the calibration screen.

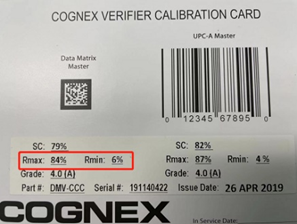
c) Use the calibration card included with the verifier and input the values from the card into the corresponding fields in the calibration interface.
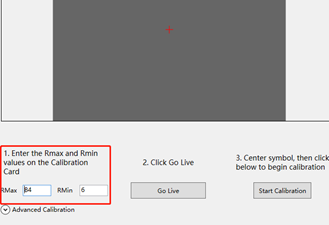
d) Click "Go Live," adjust the QR code to the center of the field of view, and click "Start Calibration." Once "Calibration Complete" appears, the calibration is finished.
2. Basic Settings
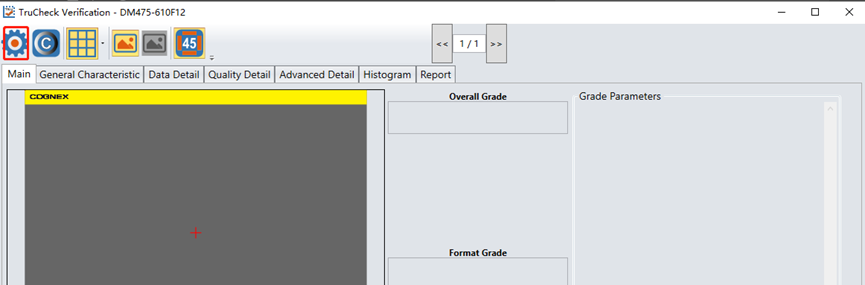
a) In the Trucheck interface, click the gear-shaped settings button to access the DataMan 475V's basic settings.
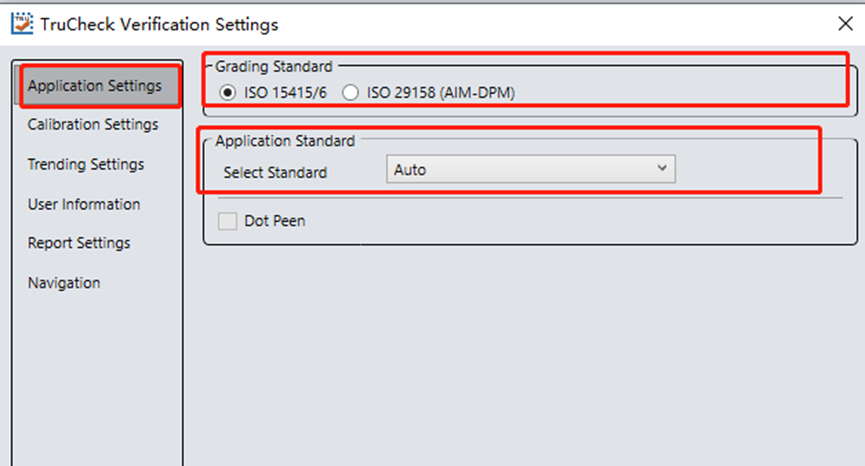
b) Here, you can set verification standards and application standards. For labels with 1D/2D codes, ISO 15415/6 applies, while DPM QR codes correspond to ISO 29158. Application standards such as GS1 or HIBCC can be selected based on actual needs.
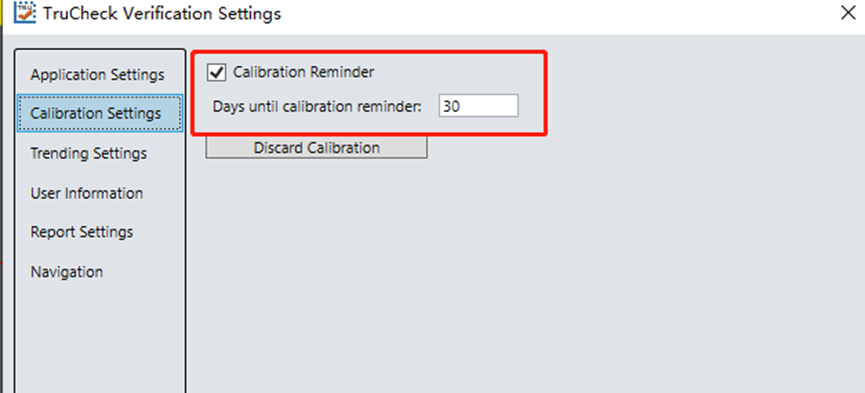
c) In the calibration options, you can set reminders for recalibration. For frequent use, it is recommended to calibrate the DataMan 475V weekly, so the reminder interval can be set to 7 days.
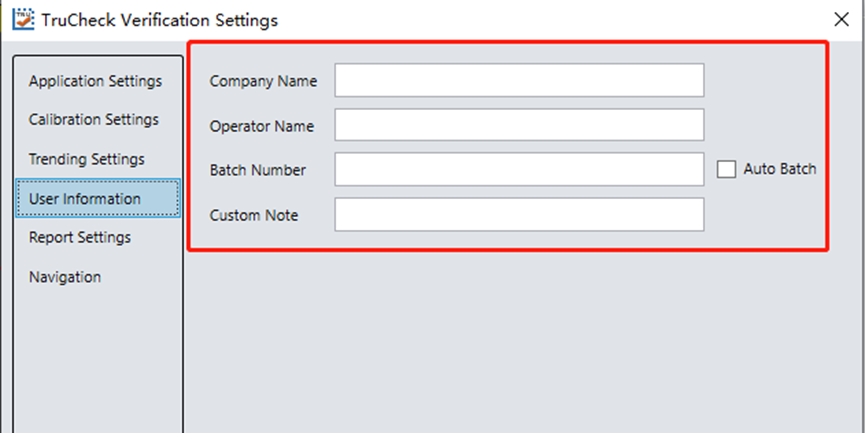
d) In the user information settings, you can input the company name and operator name, which will appear in the final verification report.
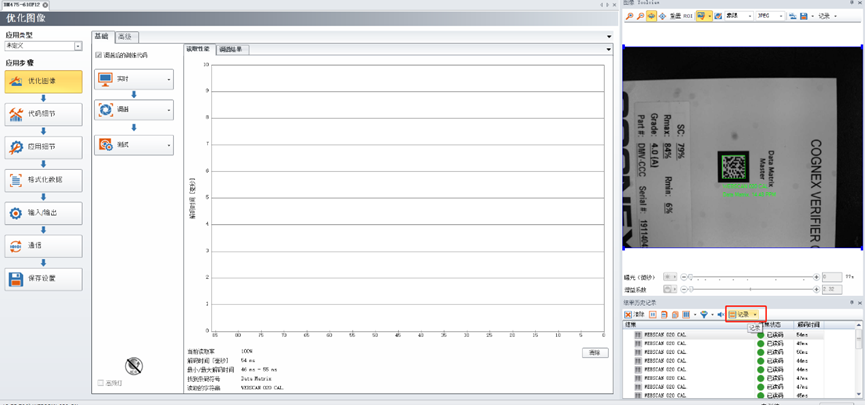
3. Basic Verification Operation
a) Click "Go Live," adjust the code to the center of the field of view, and click "Verify" to complete the verification and generate the report.
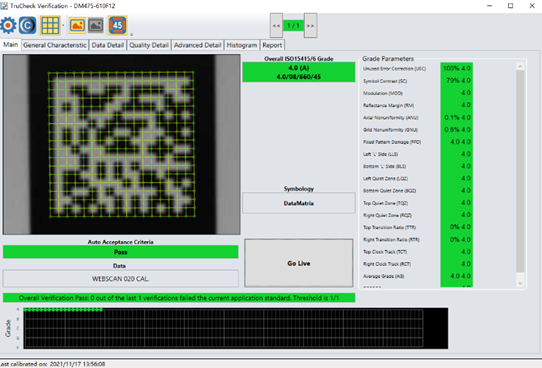
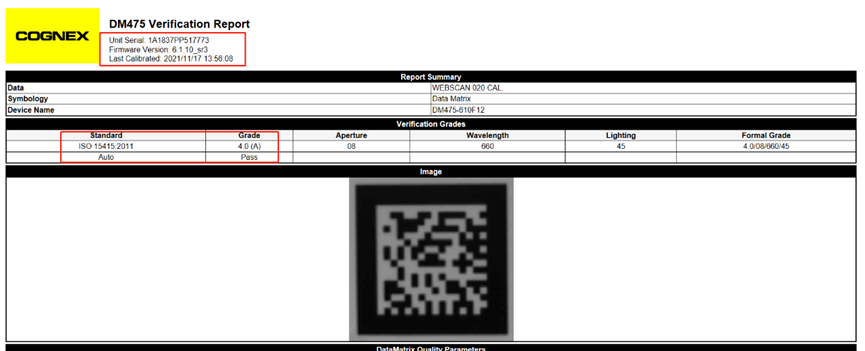
b) View the verification report by clicking "Report." The report includes the device name, last calibration time, verification results, code content, and detailed verification outcomes.
4. Save Verification Reports Locally
a) PDF Format
Return to the Setup Tool software, click the dropdown arrow next to "Record" in the results section, select "Generate Code Quality Report," and set the output path.
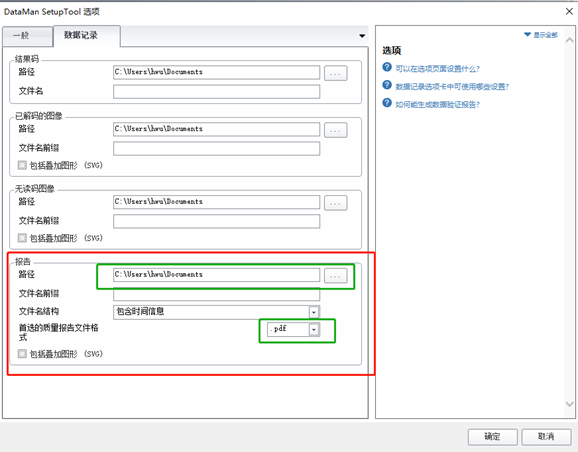
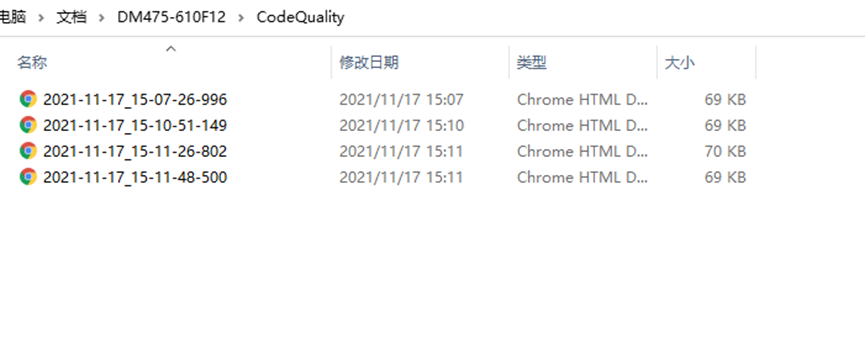
b) HTML Format
For high-speed online verification, generating a large number of PDF reports in a short time may strain local storage. In such cases, HTML format is recommended to save space. The setup method is the same as above, but select HTML as the file format.
5. Save Verification Reports in Local Excel Files
a) Set the output format. In the Setup Tool, select "Script Formatting" under "Format Data."
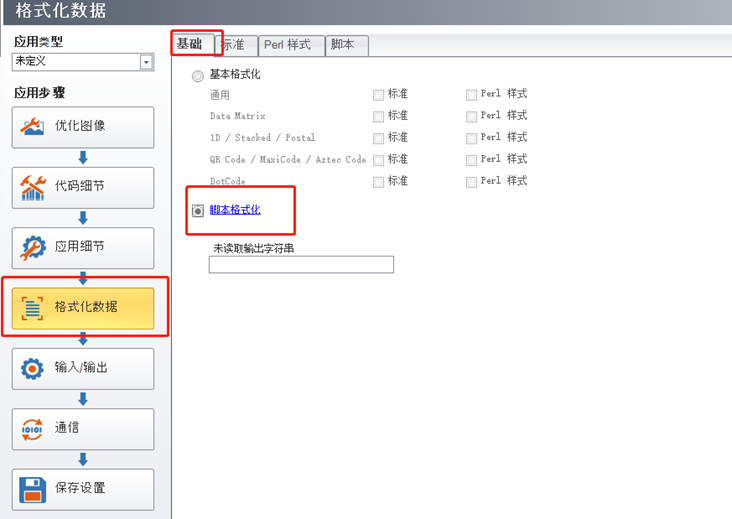
b) In the script, click the dropdown arrow next to "Insert Code Snippet" and select "Full Verification Result" under "Verification." Save the configuration. After verifying the code, the data results will display comprehensive verification summaries, including code content, code type, application standard, verification standard, trigger count, etc.

c) Install FileZilla Server or any other FTP server software.
d) In the Setup Tool, configure FTP results under "Image Recording & Playback." Enter the FTP server's IP address (PC address), port number, username, and password. Change the file name to a CSV suffix and enable FTP results.
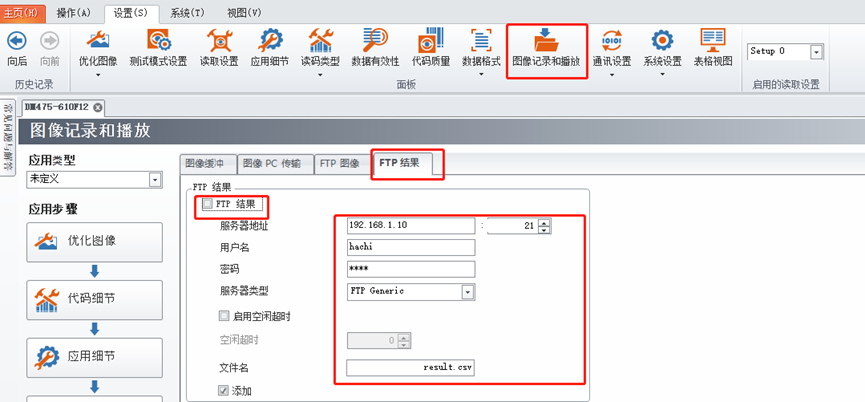
e) After triggering, the exported Excel file can be found in the specified folder.
